Custom Discord Application
In this article, we will guide you through creating a custom Discord application, rather than using the application and bot we provided by default.
[NOTE] The processguide might be difficult if you have little knowledge on Discord Developer Portal and JSON Format. Please keep in mind that it is not mandatory for the Drivers Hub to operate. If you met any problems, or need to revert to the default application we provide, please reach out in ticket.
-
Open Discord Developer Portal and click New Application.

-
Enter the name of the application, check the "agree box" and click create.
There's no requirement on the name, it could be anything you want.

-
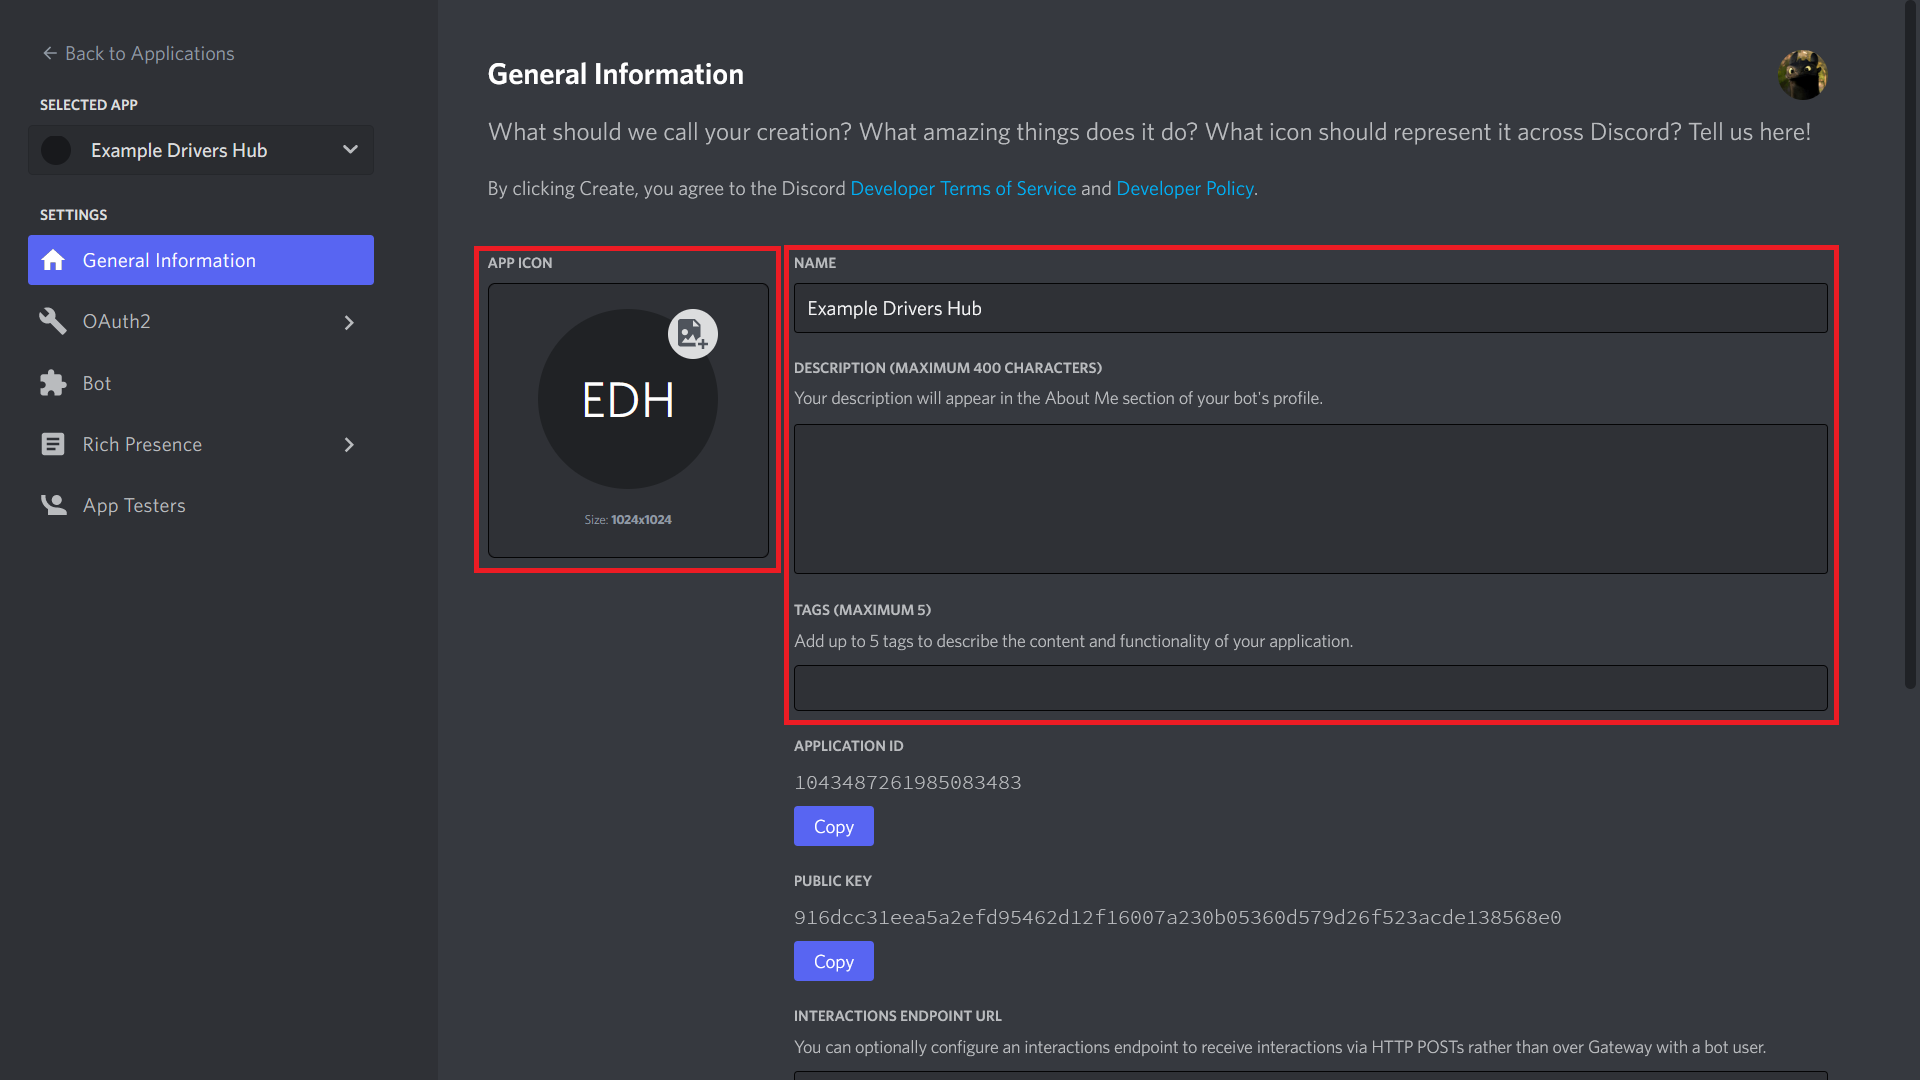
(Optional) Customize the application.
App Icon will be displayed when users authorize their Discord Account. Description will be the About Me of the bot that we will create later.
-
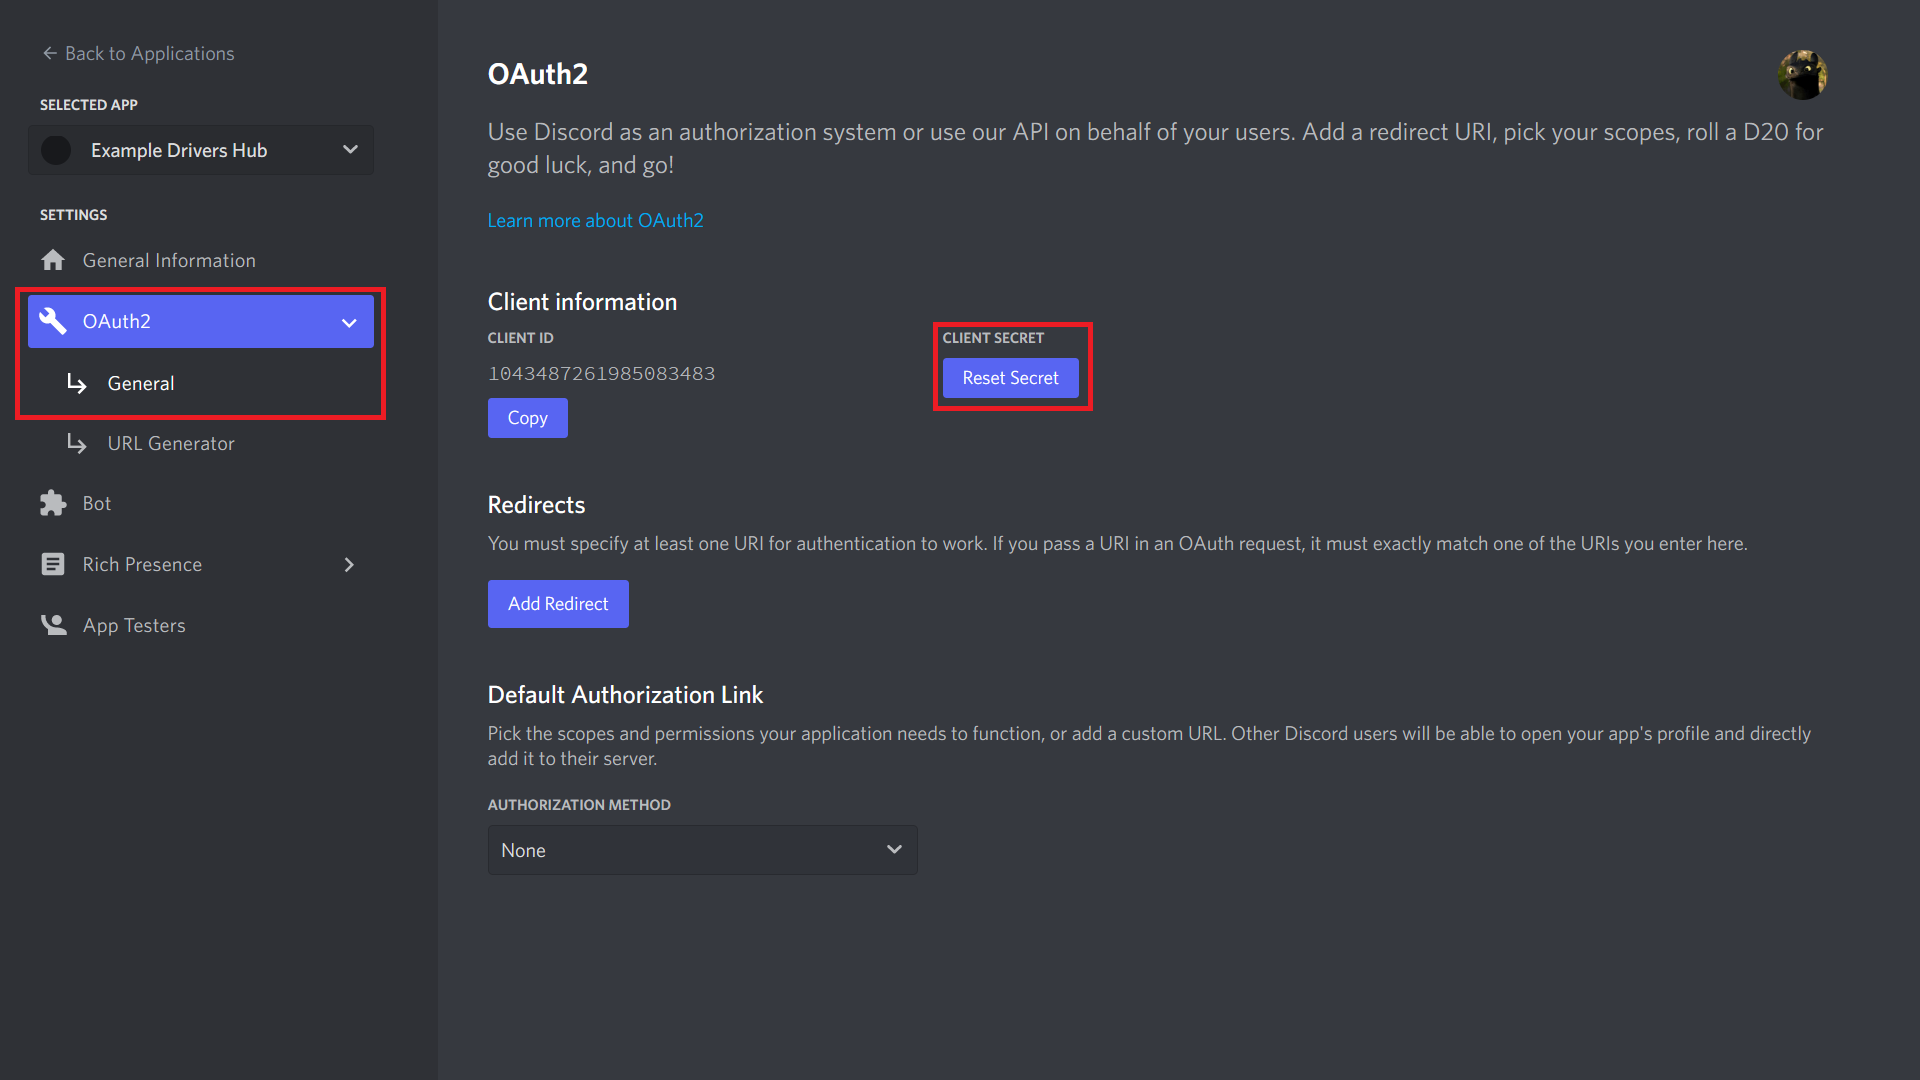
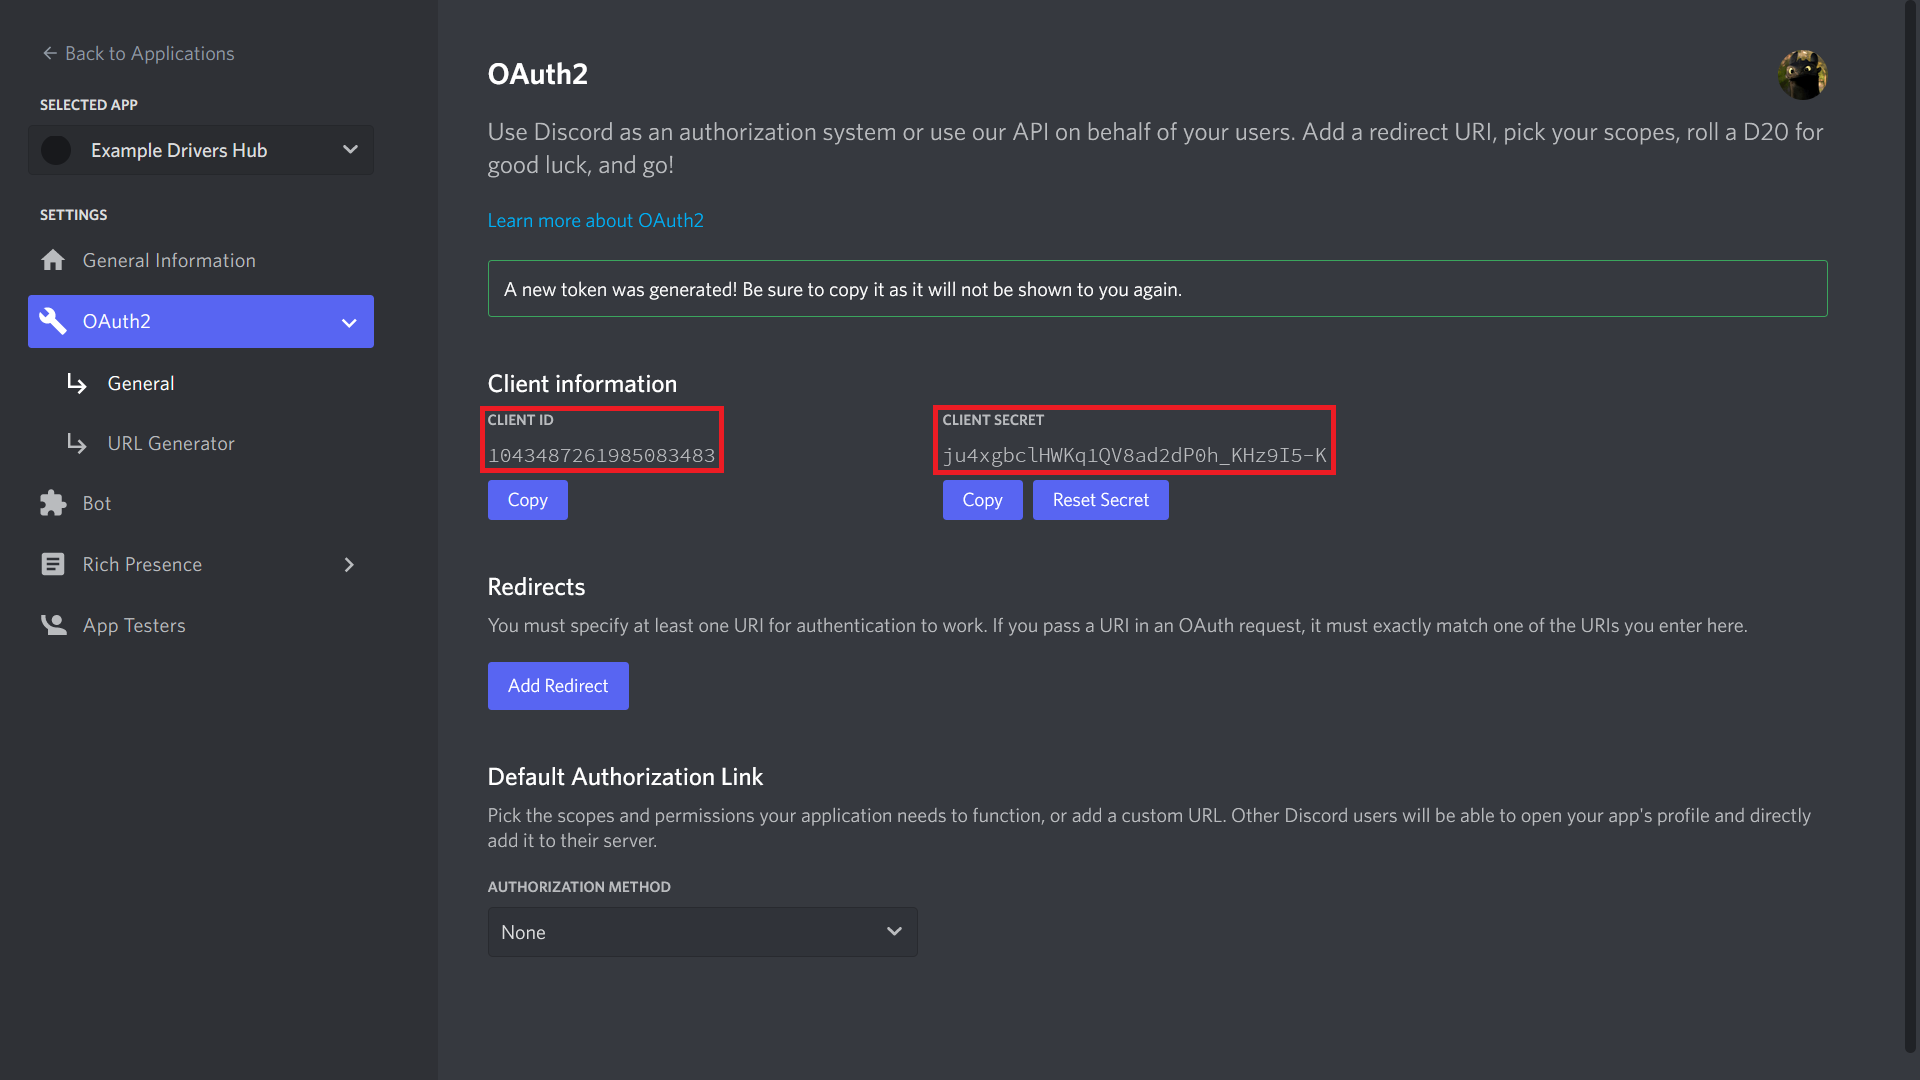
Navigate to OAuth2 - General and reset Client Reset.
i) Click Reset Secret.
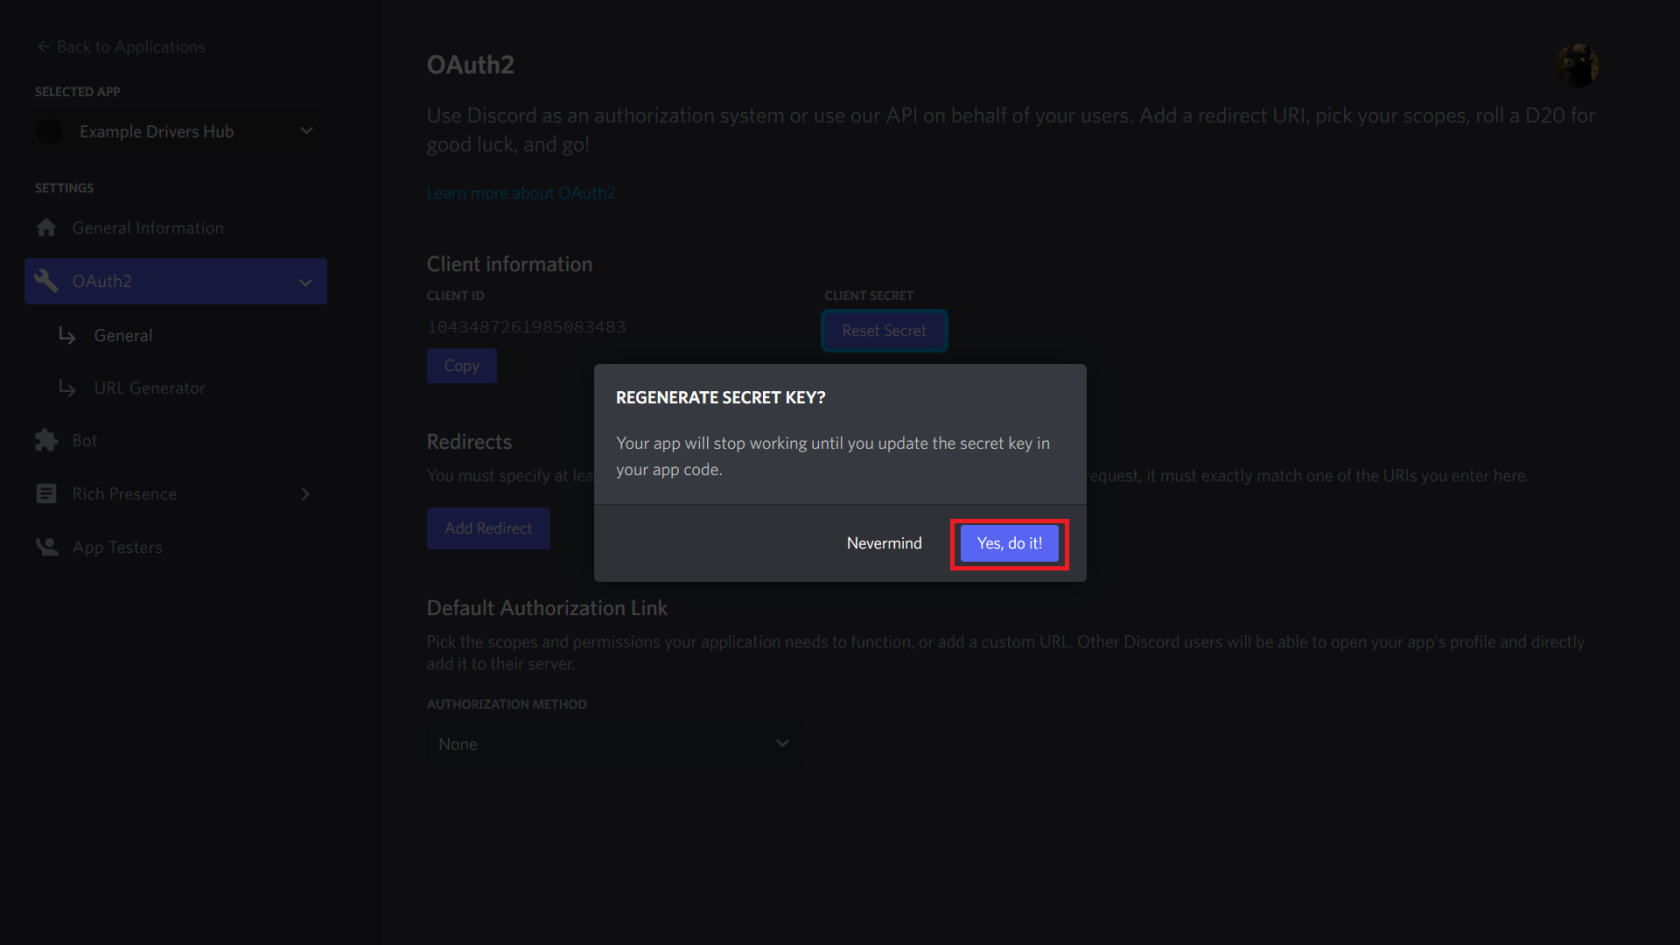
ii) A prompt will be shown. Click Yes, do it!
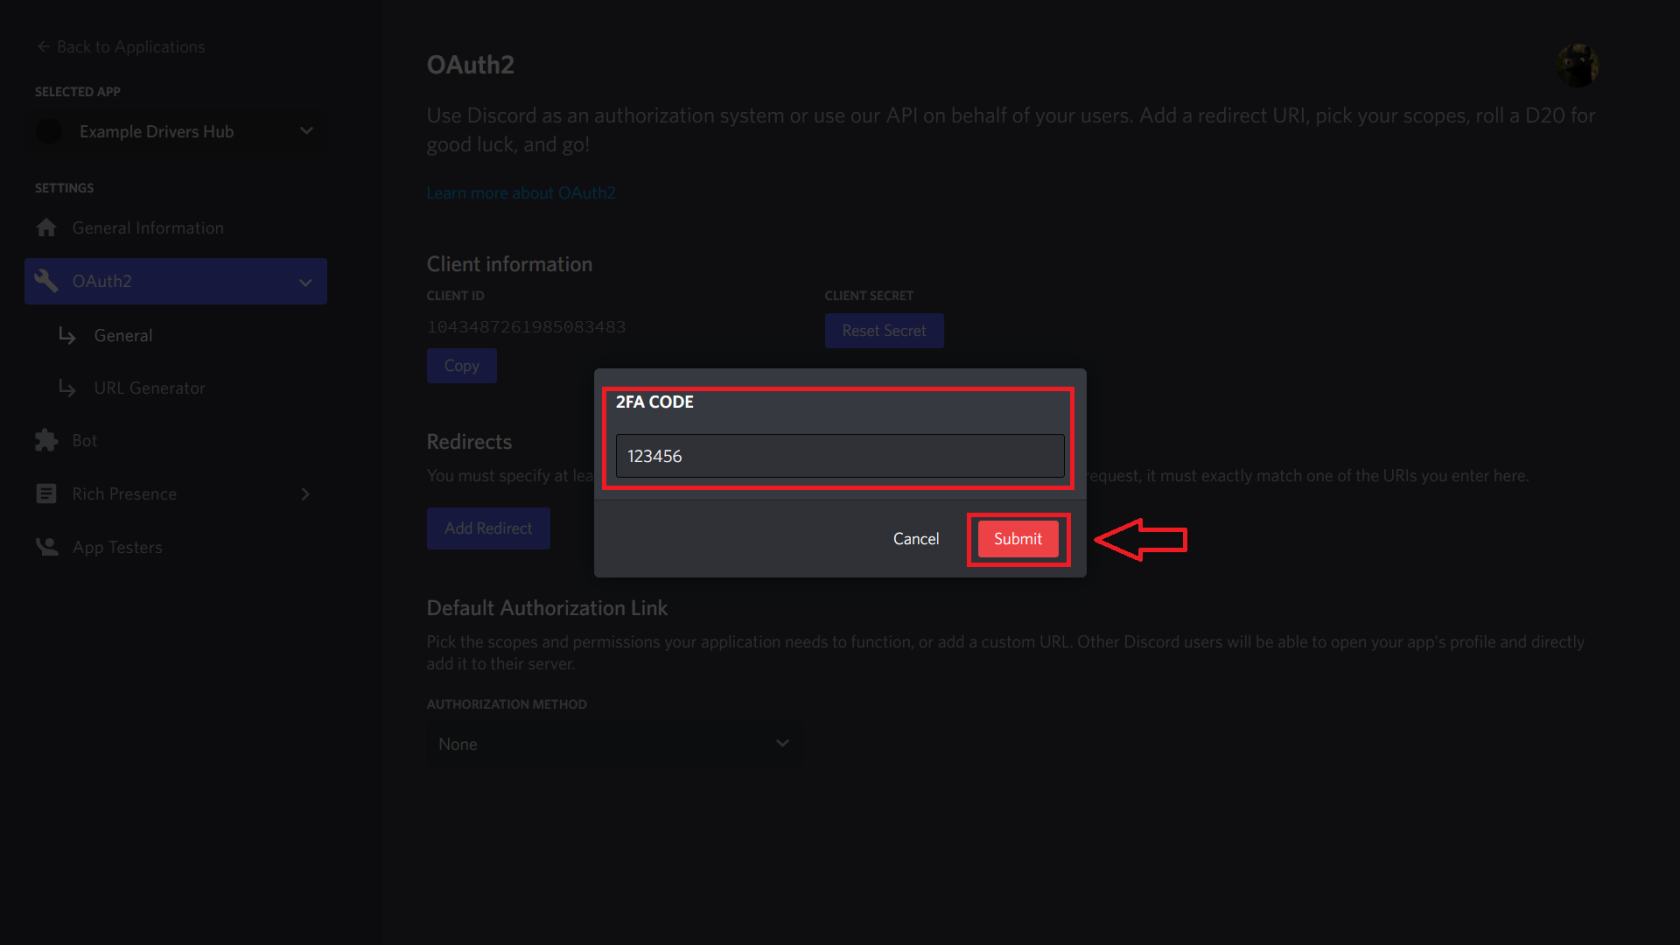
iii) You'll be asked for 2FA Code if enabled. Enter the code and click Submit.
-
Copy Client ID and Client Secret, switch to Drivers Hub tab and paste them as
discord_client_idanddiscord_client_secretin JSON Config.

-
In order for the Discord Application to verify your identity on the Hub and perform various redirects, click the Add Redirect button in the "OAuth2 - General > Redirects" section to create a new redirect by entering the
https://{your_hub_domain}/discord-authvalue and save the changes with the Save Changes button.
You have to enter your own hub address instead of the{your_hub_domain}placeholder.
Example:https://hub.gokboru.net.tr/discord-auth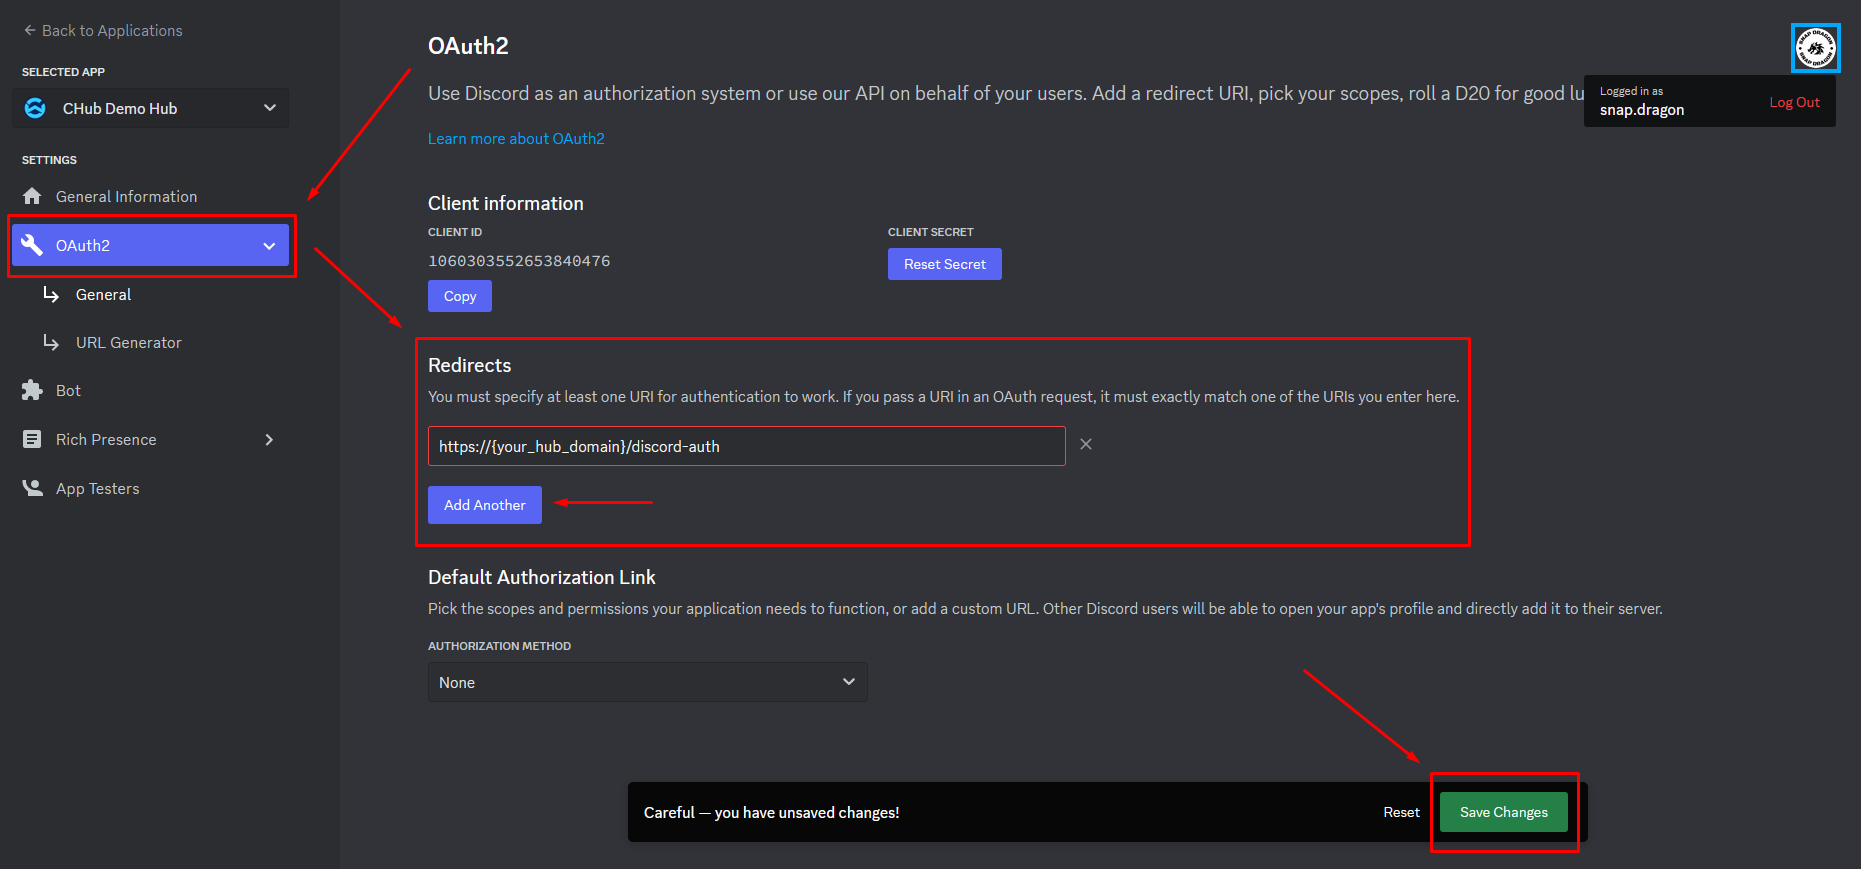
-
Switch to Discord Developers Portal, create a bot.
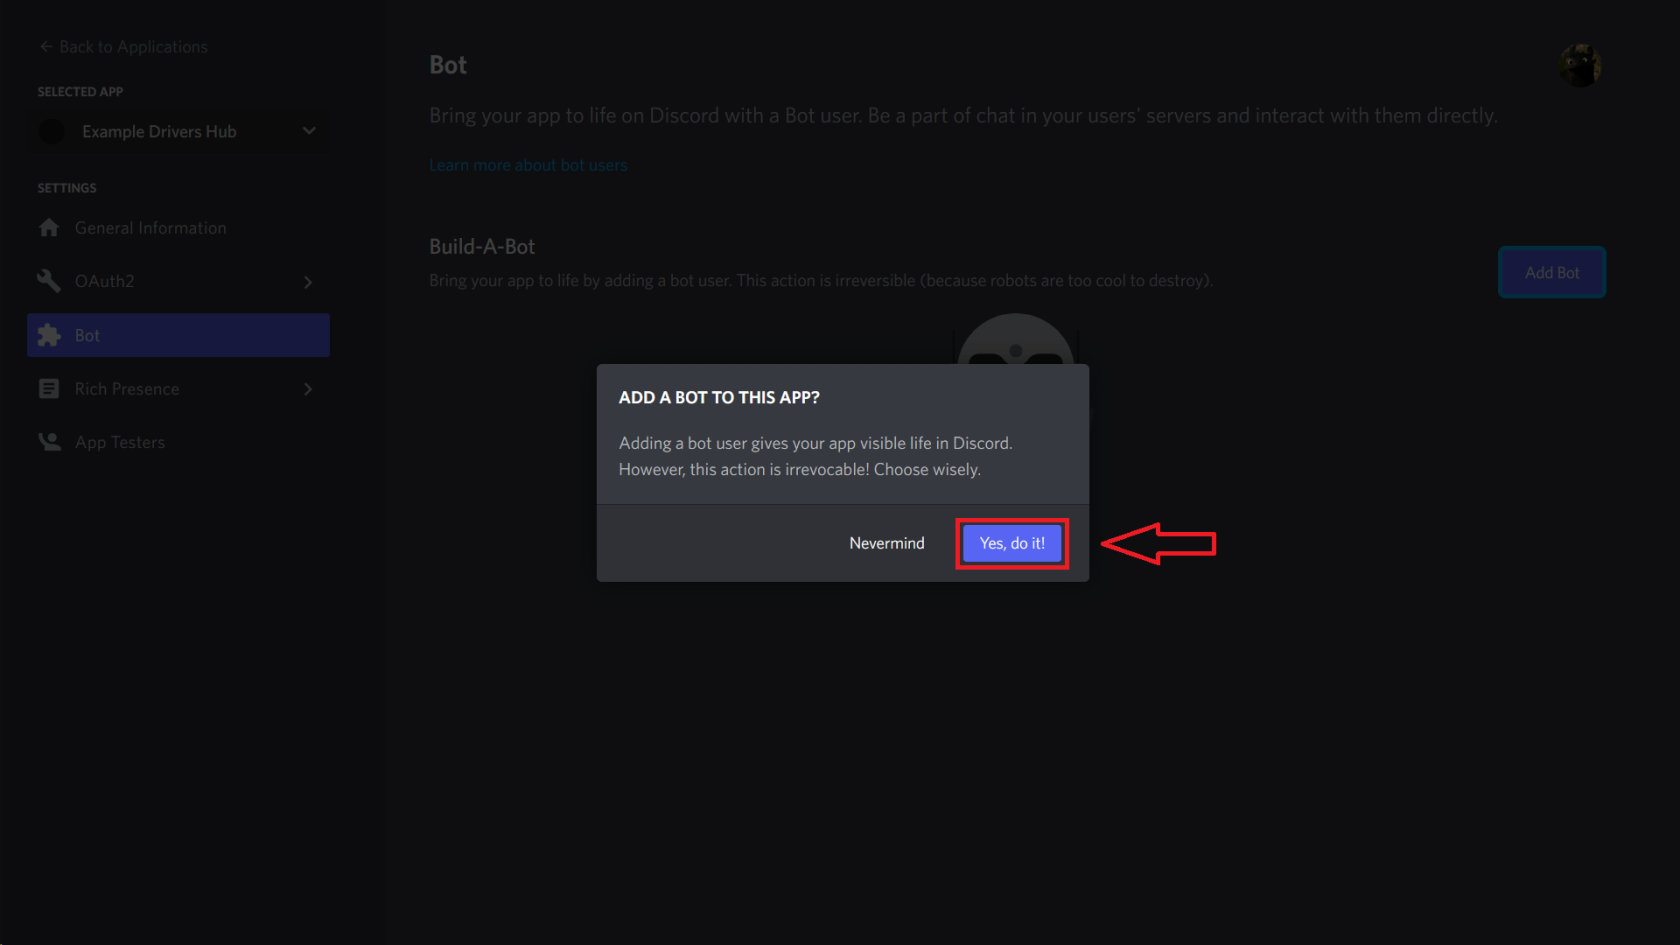
i) Navigate to Bot, and click Add Bot.
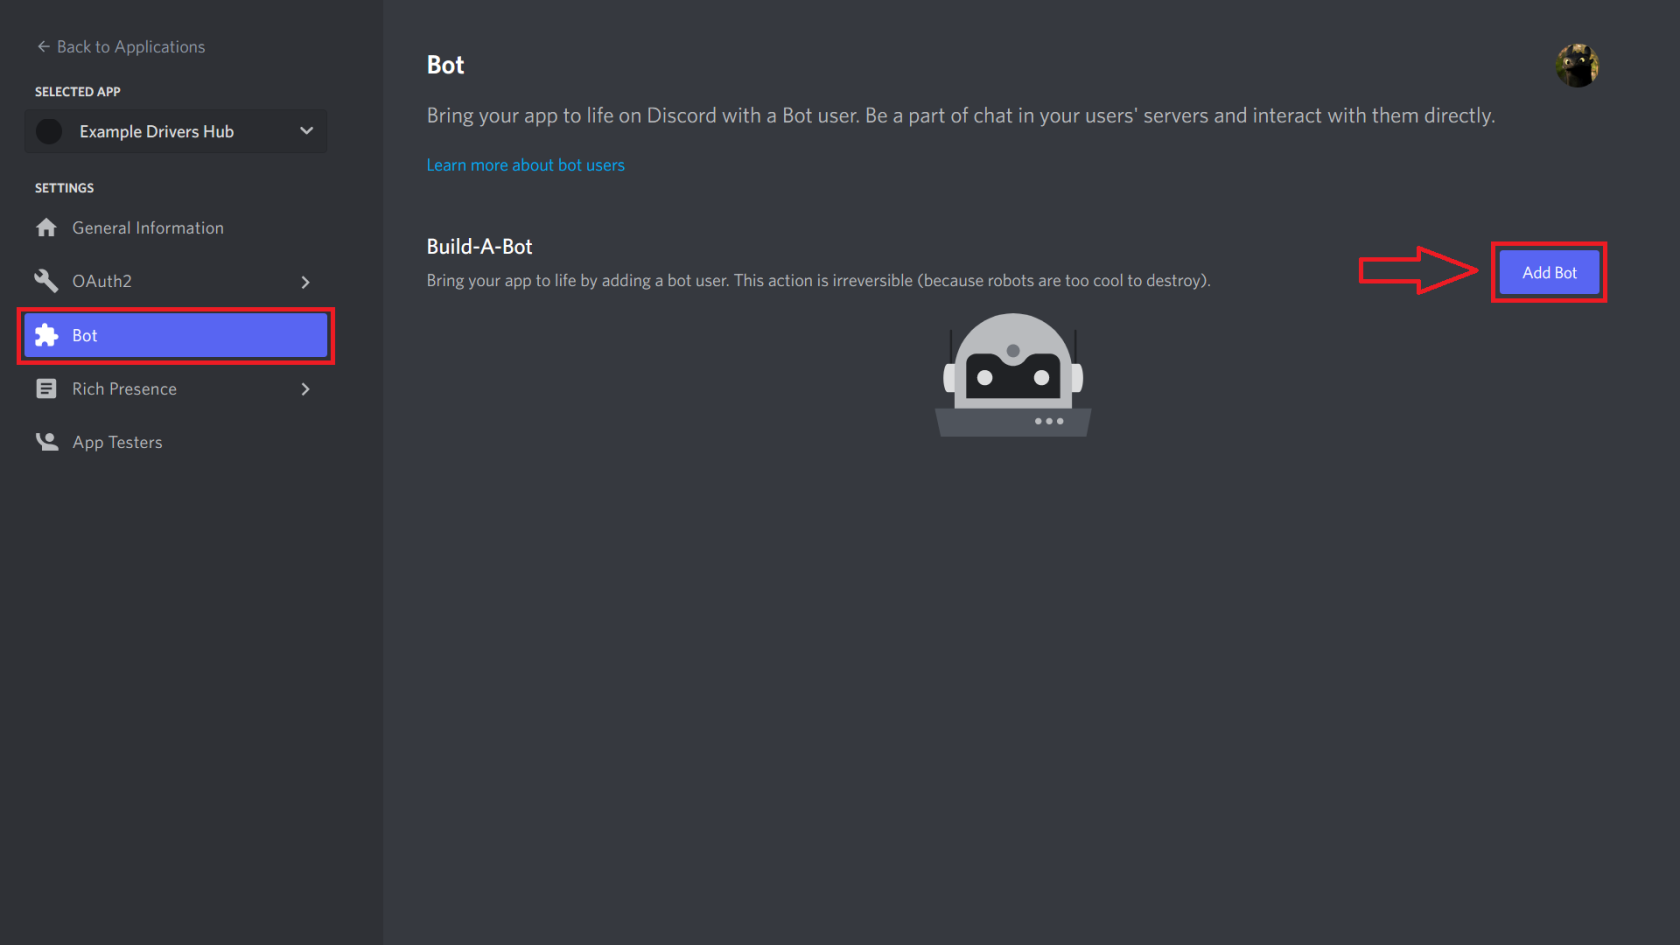
ii) A prompt will be shown. Click Yes, do it!
-
(Optional) Customize the bot.
Icon will be the bot's avatar.
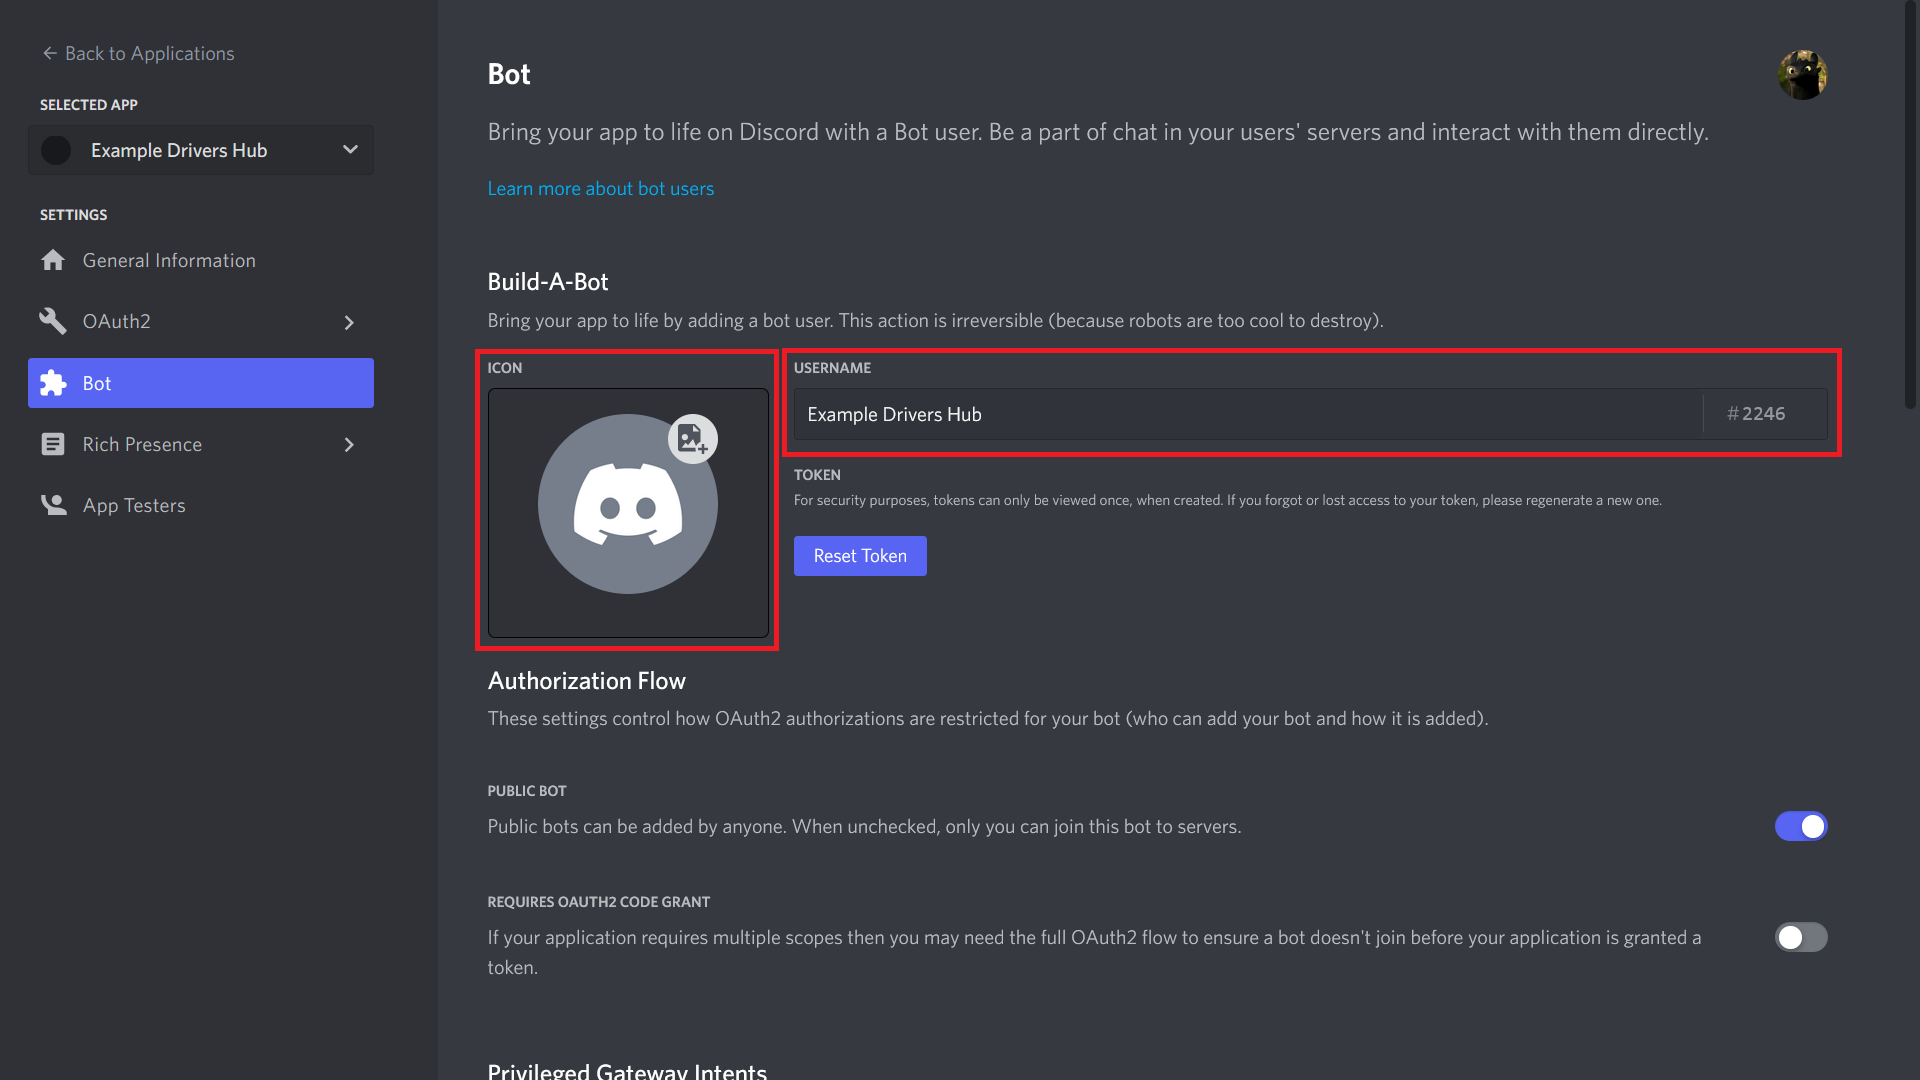
-
Scroll down, enable all Privileged Gateway Intents.
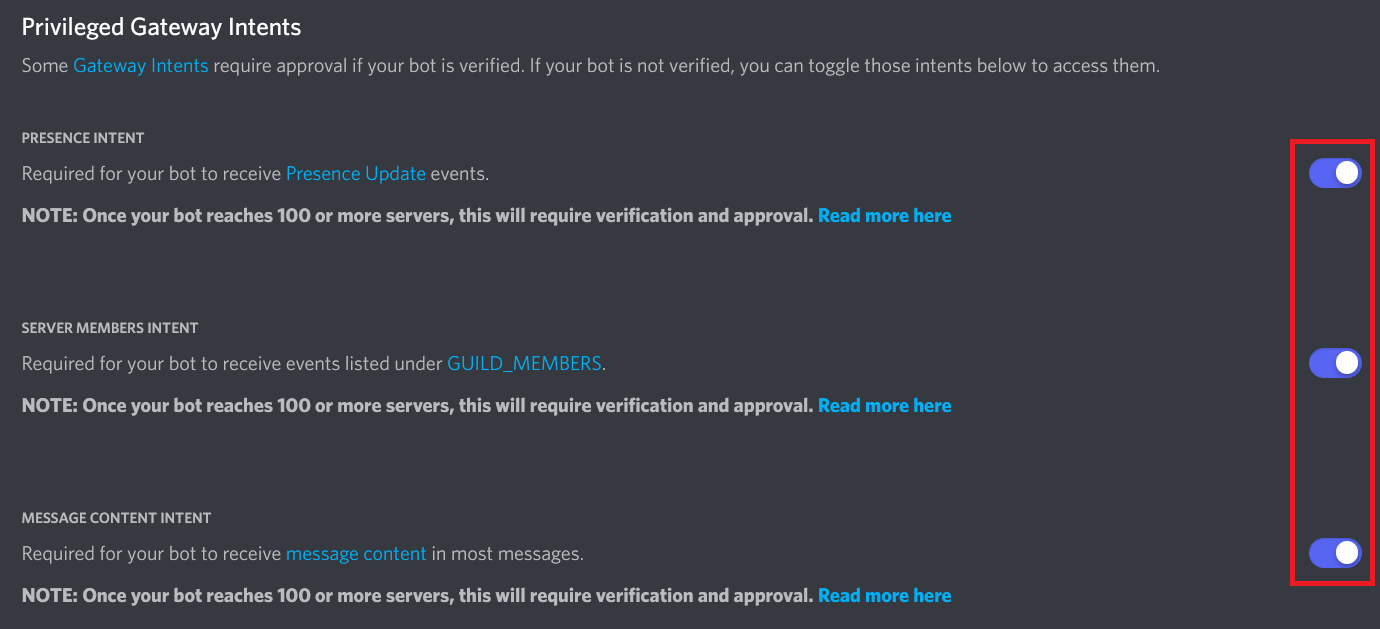
-
Reset the bot's token, just like when you reset the client secret.
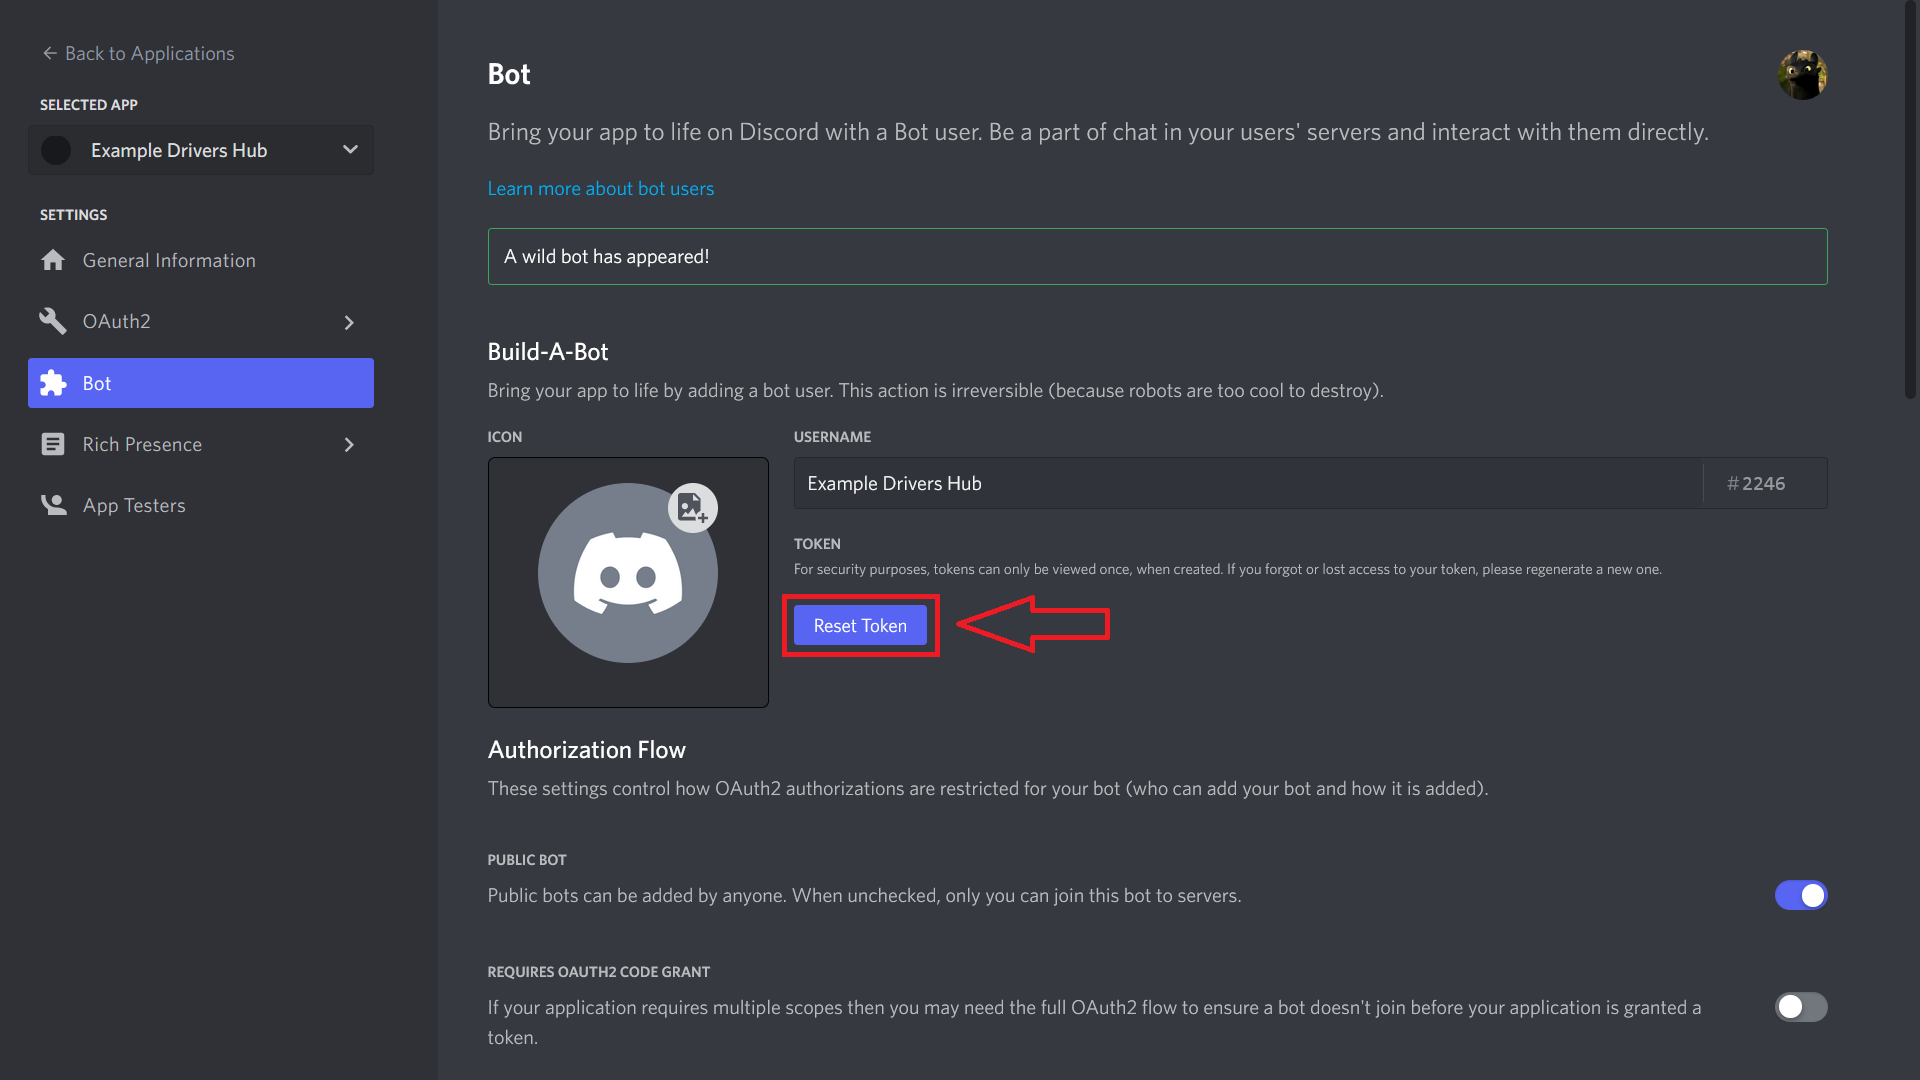
-
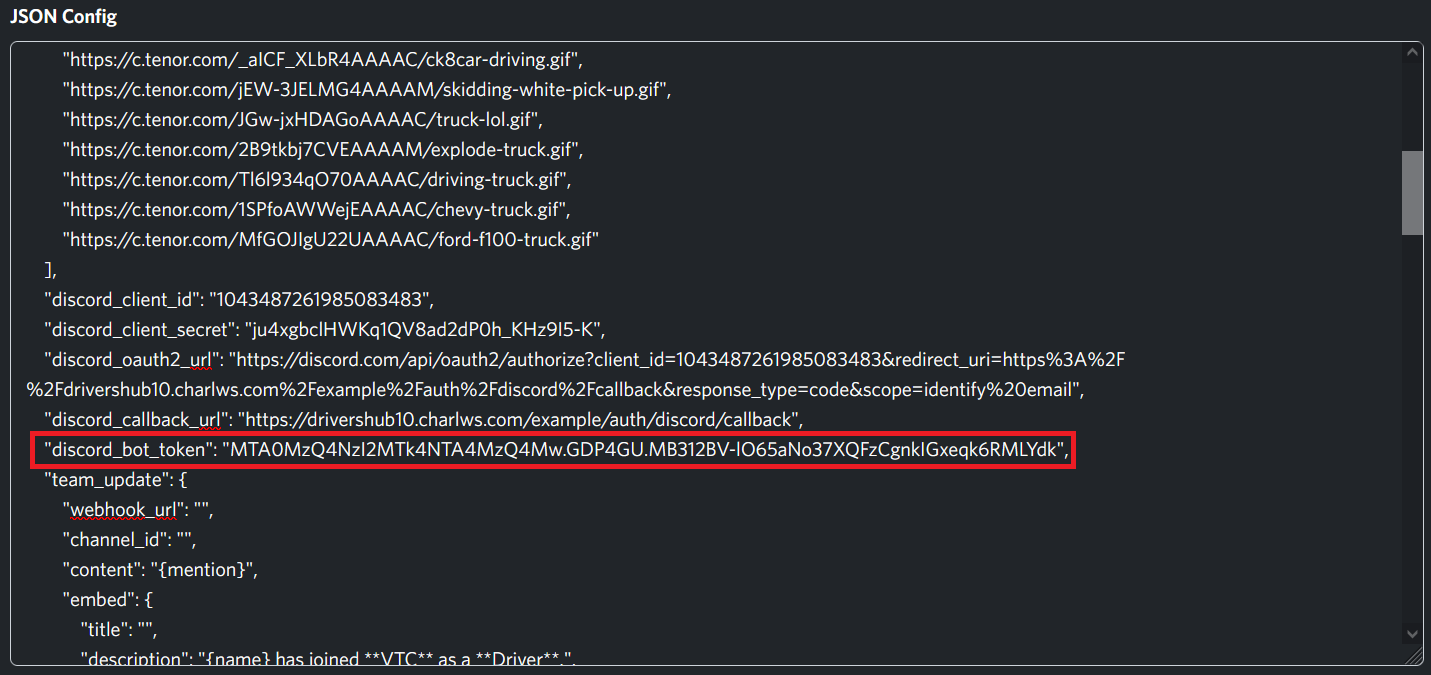
Copy Token, switch to Drivers Hub tab and paste it as
discord_bot_tokenin JSON Config.

-
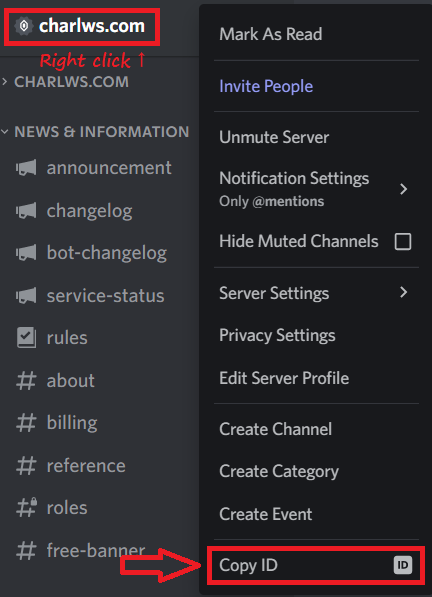
Open Discord Application, go to the VTC's Discord Server, right click it's name, then click Copy ID.
Note that you have to enable Developer Mode to make Copy ID button show. We won't provide guide on enabling Developer Mode here as there's hundreds of existing guide on the Internet.
-
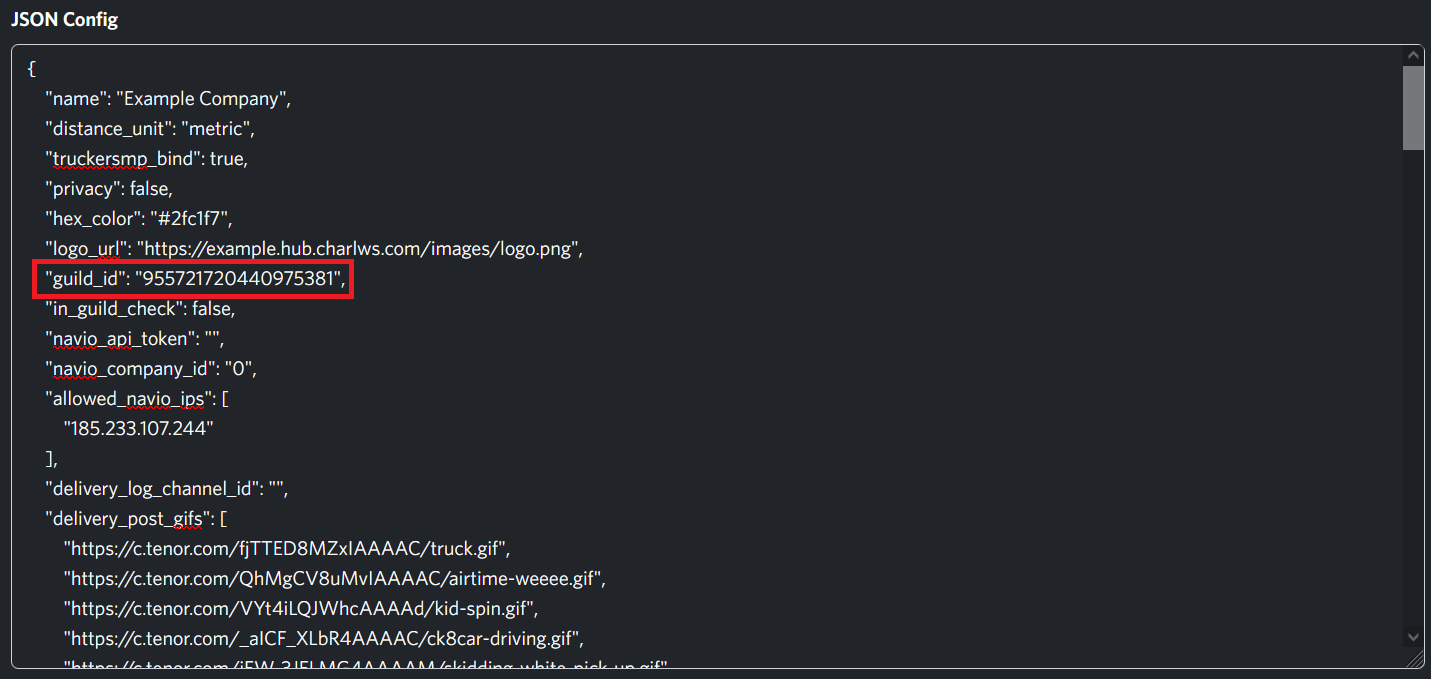
Switch to Drivers Hub tab, paste the ID as
guild_idin JSON Config.
-
Save config. (You cannot reload until you enable MFA)

-
Switch to settings and enable MFA.

-
Switch to configuration and reload API.
-
Invite the bot to VTC's Discord Server. This could be done by changing the scopes in URL Generator to
botandapplication.commands, and checking Manage Roles, Send Messages, Read Message History in bot permissions (note that these permissions are required by Drivers Hub Discord Integration, it might need more permissions if you use the bot for other purposes). Then copy the generated URL and open it in browser to add the bot to a Discord Server.
Please search on the Internet if you need more guide on inviting a bot to a Discord Server.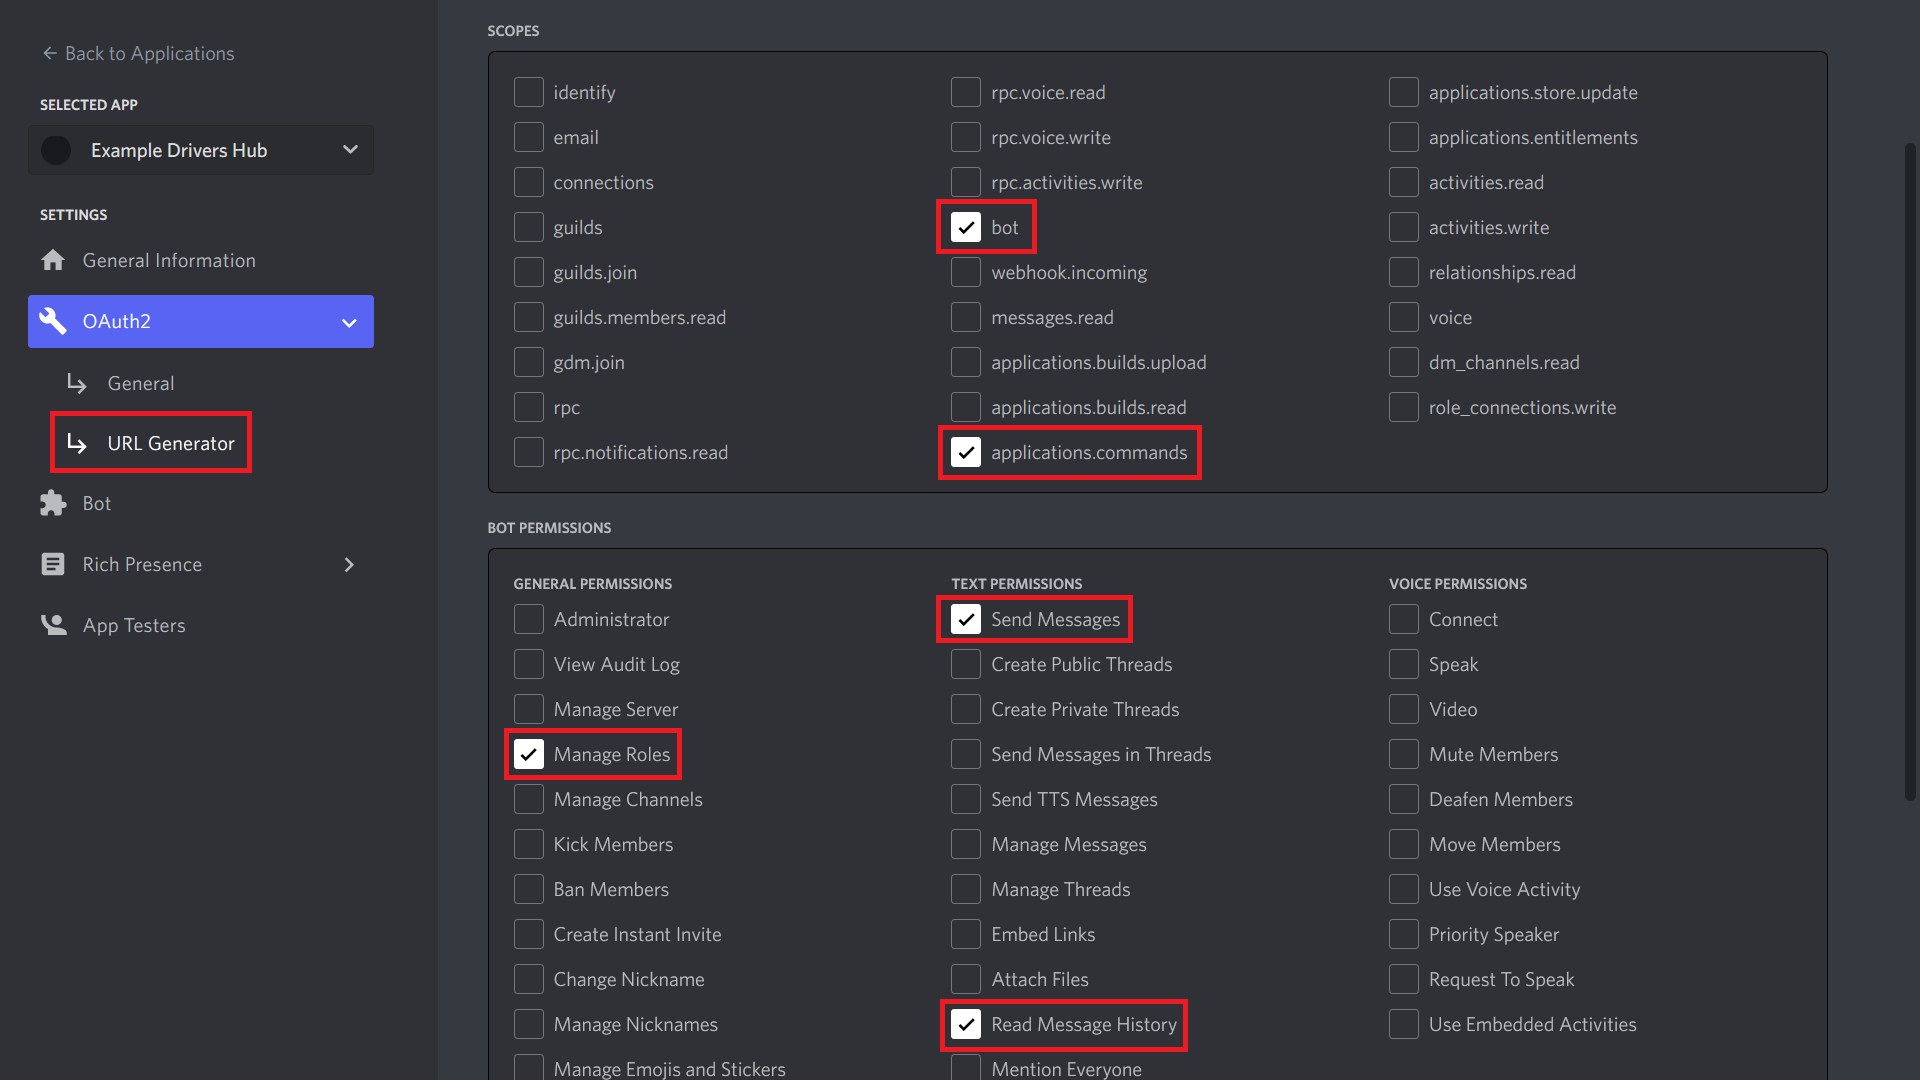

-
The API reload usually takes up to 60 seconds. You will have to clear browser cache for the website before trying to login with Discord (because the
discord_client_idis cached forever).
Also, keep in mind thatdiscord_client_secretanddiscord_bot_tokenwill be empty when you load the config again for security reasons, they are stored in the server so don't worry!

[NOTE] You may want to configure the Verify Linked Role URL to enable linked roles in Discord. We'll update the documentation in the future~
Next Step: TrackSim Integration